Setting up Kubernetes to manage containers on the Google Cloud Platform
These days the pace of innovation in DevOps can leave you feeling like you’re jogging on a treadmill programmed to run faster than Usain Bolt. Mastery requires hours of practice and the last decade in DevOps has not allowed for it. Before gaining 10 years of experience running virtual machines using VmWare in private data-centers, private cloud software like Openstack and Cloudstack came along, and just when you and your team painfully achieved a stable install you were told running virtual machines in public clouds like AWS, GCP, and Azure is the way forward. By the time you got there it was time to switch to containers, and before you can fully appreciate those, server-less functions are on the horizon, but I digress. If you want to know more about server-less functions, see my previous article on AWS Lambda. Instead, this article will focus on running Docker containers inside of a Kubernetes cluster on Google’s Cloud Platform.
Linux Containers, which were recently popularized by Docker need something to help manage them and while there are many choices, Kubernetes the open-sourced container management system from Google is the undisputed king at this time. Given that Kubernetes was started by Google, it should be expected that the easiest way to install it is using Google’s Cloud Platform (GCP). However, Openshift from Redhat also provides a nice batteries included abstraction if you need to get up and running quickly as well as kops.
Pre-Requisites
The main pre-requisites you need for this article is a Google Cloud Platform account and installing the gcloud utility via the SDK.
In addition, you need some form of a computer with Internet connectivity, some typing skills, a brain that can read, and a determination to finish…For now I will give you the benefit of the doubt and assume you have all of these. It is also nice to have your beverage of choice while you do this, a fine tea, ice cold beer, or glass of wine will work, but for Cancer’s sake please skip the sugar.
Here is where I would normally insert a link to facts on sugar and Cancer’s link, but I literally just learned I would be spreading rumors… Fine drink your Kool-Aid, but don’t blame me for your calories.
The Build Out of our Self Healing IRC Server Hosting Containers
I lied dude, IRC is so 1995 and unfortunately, ICQ’s been dead and Slack won’t let me host their sexy chat application with game like spirit and better jokes than Kevin Heart. So…sorry to excite you… but I guess I will fallback to the docs here and install Nginx like us newb’s are supposed to.
Numero Uno (Step 1 dude)
As part of the installation of the gcloud / SDK you should have ran gcloud init, which requires you to login with your Google account via a web browser.
You must log in to continue. Would you like to log in (Y/n)?  Y

Your browser has been opened to visit:

    https://accounts.google.com/o/oauth2/auth?redirect_uri=http%3A%2F%2Flocalhost%3A8085%2F&prompt=select_account&response_type=code&client_id=32555940559.apps.googleusercontent.com&scope=https%3A%2F%2Fwww.googleapis.com%2Fauth%2Fuserinfo.email+https%3A%2F%2Fwww.googleapis.com%2Fauth%2Fcloud-platform+https%3A%2F%2Fwww.googleapis.com%2Fauth%2Fappengine.admin+https%3A%2F%2Fwww.googleapis.com%2Fauth%2Fcompute+https%3A%2F%2Fwww.googleapis.com%2Fauth%2Faccounts.reauth&access_type=offline


You are logged in as: [tuxninja@tuxlabs.com].

This account has no projects.

Would you like to create one? (Y/n)?  Y
After clicking allow in your browser you will be logged in…and asked about creating an initial Project. Say yes (type Y and hit enter).
Enter a Project ID. Note that a Project ID CANNOT be changed later.
Project IDs must be 6-30 characters (lowercase ASCII, digits, or
hyphens) in length and start with a lowercase letter. tuxlabsdemo
Your current project has been set to: [tuxlabsdemo].

Not setting default zone/region (this feature makes it easier to use
[gcloud compute] by setting an appropriate default value for the
--zone and --region flag).
See https://cloud.google.com/compute/docs/gcloud-compute section on how to set
default compute region and zone manually. If you would like [gcloud init] to be
able to do this for you the next time you run it, make sure the
Compute Engine API is enabled for your project on the
https://console.developers.google.com/apis page.

Your Google Cloud SDK is configured and ready to use!
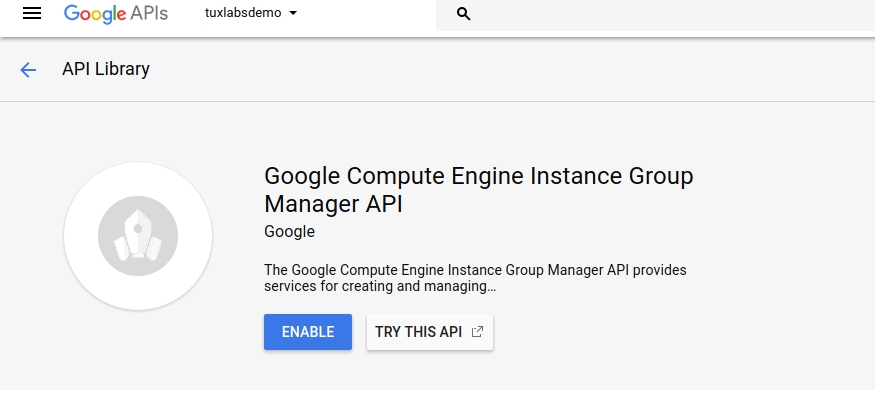
Sweet your Project is now created. In order to use the Google Cloud API’s you must first enable access by visiting https://console.developers.google.com/apis/api/replicapool.googleapis.com/overview and clicking enable.
That will take a minute. Once completed you will be able to run gcloud commands against your Project. We can set the default region for our project like so:
tuxninja@tldev1:~/google-cloud-sdk$ gcloud compute project-info add-metadata --metadata google-compute-default-region=us-west1
Updated [https://www.googleapis.com/compute/v1/projects/tuxlabsdemo].
tuxninja@tldev1:~/google-cloud-sdk$
If you get an error here, stop being cheap and link your project to your billing account in the console.
Additionally, we want to set the default region/zone for gcloud commands like so:
tuxninja@tldev1:~$ gcloud config set compute/region us-west1
Updated property [compute/region].
tuxninja@tldev1:~$ gcloud config set compute/zone us-west1-a
Updated property [compute/zone].
tuxninja@tldev1:~$
Numero Dos Equis
We need to install kubectl so we can interact with Kubernetes.
tuxninja@tldev1:~$ gcloud components install kubectl


Your current Cloud SDK version is: 175.0.0
Installing components from version: 175.0.0

┌──────────────────────────────────────────────────────────────────┐
│               These components will be installed.                │
├─────────────────────┬─────────────────────┬──────────────────────┤
│         Name        │       Version       │         Size         │
├─────────────────────┼─────────────────────┼──────────────────────┤
│ kubectl             │               1.7.6 │             16.0 MiB │
│ kubectl             │                     │                      │
└─────────────────────┴─────────────────────┴──────────────────────┘

For the latest full release notes, please visit:
  https://cloud.google.com/sdk/release_notes

Do you want to continue (Y/n)?  Y

╔════════════════════════════════════════════════════════════╗
╠═ Creating update staging area                             ═╣
╠════════════════════════════════════════════════════════════╣
╠═ Installing: kubectl                                      ═╣
╠════════════════════════════════════════════════════════════╣
╠═ Installing: kubectl                                      ═╣
╠════════════════════════════════════════════════════════════╣
╠═ Creating backup and activating new installation          ═╣
╚════════════════════════════════════════════════════════════╝

Performing post processing steps...done.

Update done!

tuxninja@tldev1:~$
Once that is done, quickly realize someone spent an obscene amount of time making that install as pretty as it was without using ncurses. Shout out to that geek.
Numero Tres Deliquentes
Time to create our Kubernetes cluster. Run this command and “it’s going to be LEGEND….Wait for it….
tuxninja@tldev1:~$ gcloud container clusters create tuxlabs-kubernetes
Creating cluster tuxlabs-kubernetes...done.
Created [https://container.googleapis.com/v1/projects/tuxlabsdemo/zones/us-west1-a/clusters/tuxlabs-kubernetes].
kubeconfig entry generated for tuxlabs-kubernetes.
NAME                ZONE        MASTER_VERSION  MASTER_IP       MACHINE_TYPE   NODE_VERSION  NUM_NODES  STATUS
tuxlabs-kubernetes  us-west1-a  1.7.6-gke.1     35.197.120.249  n1-standard-1  1.7.6         3          RUNNING
tuxninja@tldev1:~$
And I hope you’re not lactose intolerant cause the second half of that word is DAIRY.” – NPH
Numero (Audi) Quattro
Now you should be able to see all running Kubernetes services in your cluster like so:
tuxninja@tldev1:~$ kubectl get --all-namespaces services
NAMESPACE     NAME                   TYPE        CLUSTER-IP      EXTERNAL-IP   PORT(S)         AGE
default       kubernetes             ClusterIP   10.19.240.1     <none>        443/TCP         15m
kube-system   default-http-backend   NodePort    10.19.254.83    <none>        80:31154/TCP    14m
kube-system   heapster               ClusterIP   10.19.247.182   <none>        80/TCP          14m
kube-system   kube-dns               ClusterIP   10.19.240.10    <none>        53/UDP,53/TCP   14m
kube-system   kubernetes-dashboard   ClusterIP   10.19.249.188   <none>        80/TCP          14m
tuxninja@tldev1:~$
And we can see the pods like so:
tuxninja@tldev1:~$ kubectl get --all-namespaces pods
NAMESPACE     NAME                                                           READY     STATUS    RESTARTS   AGE
kube-system   event-exporter-1421584133-zlvnd                                2/2       Running   0          16m
kube-system   fluentd-gcp-v2.0-1nb9x                                         2/2       Running   0          16m
kube-system   fluentd-gcp-v2.0-bpqtv                                         2/2       Running   0          16m
kube-system   fluentd-gcp-v2.0-mntjl                                         2/2       Running   0          16m
kube-system   heapster-v1.4.2-339128277-gxh5g                                3/3       Running   0          15m
kube-system   kube-dns-3468831164-5nn05                                      3/3       Running   0          15m
kube-system   kube-dns-3468831164-wcwtg                                      3/3       Running   0          16m
kube-system   kube-dns-autoscaler-244676396-fnq9g                            1/1       Running   0          16m
kube-system   kube-proxy-gke-tuxlabs-kubernetes-default-pool-6ede7d6a-nvfg   1/1       Running   0          16m
kube-system   kube-proxy-gke-tuxlabs-kubernetes-default-pool-6ede7d6a-pr82   1/1       Running   0          16m
kube-system   kube-proxy-gke-tuxlabs-kubernetes-default-pool-6ede7d6a-w6p8   1/1       Running   0          16m
kube-system   kubernetes-dashboard-1265873680-gftnz                          1/1       Running   0          16m
kube-system   l7-default-backend-3623108927-57292                            1/1       Running   0          16m
tuxninja@tldev1:~$
Numero Cinco (de Mayo)
You now have an active Kubernetes cluster. That is pretty sweet huh? Make sure you take the time to check out what’s running under the hood in the Google Compute Engine as well.
tuxninja@tldev1:~$ gcloud compute instances list
NAME                                               ZONE        MACHINE_TYPE   PREEMPTIBLE  INTERNAL_IP  EXTERNAL_IP     STATUS
gke-tuxlabs-kubernetes-default-pool-6ede7d6a-nvfg  us-west1-a  n1-standard-1               10.138.0.2   35.197.94.114   RUNNING
gke-tuxlabs-kubernetes-default-pool-6ede7d6a-pr82  us-west1-a  n1-standard-1               10.138.0.3   35.197.2.247    RUNNING
gke-tuxlabs-kubernetes-default-pool-6ede7d6a-w6p8  us-west1-a  n1-standard-1               10.138.0.4   35.197.117.173  RUNNING
tuxninja@tldev1:~$
Ok, for our final act, I promised Nginx…sigh…Let’s get this over with!
Step 1, create this nifty YAML file:
apiVersion: apps/v1beta1
kind: Deployment
metadata:
  name: nginx-deployment
spec:
  selector:
    matchLabels:
      app: nginx
  replicas: 2 # tells deployment to run 2 pods matching the template
  template: # create pods using pod definition in this template
    metadata:
      # unlike pod-nginx.yaml, the name is not included in the meta data as a unique name is
      # generated from the deployment name
      labels:
        app: nginx
    spec:
      containers:
      - name: nginx
        image: nginx:1.7.9
        ports:
        - containerPort: 80
Save it as deployment.yaml, then apply it!
tuxninja@tldev1:~$ kubectl apply -f deployment.yaml
deployment "nginx-deployment" created
tuxninja@tldev1:~$
We can describe our deployment like this:
tuxninja@tldev1:~$ kubectl describe deployment nginx-deployment
Name:                   nginx-deployment
Namespace:              default
CreationTimestamp:      Sun, 15 Oct 2017 07:10:52 +0000
Labels:                 app=nginx
Annotations:            deployment.kubernetes.io/revision=1
                        kubectl.kubernetes.io/last-applied-configuration={"apiVersion":"apps/v1beta1","kind":"Deployment","metadata":{"annotations":{},"name":"nginx-deployment","namespace":"default"},"spec":{"replicas":2,"se...
Selector:               app=nginx
Replicas:               2 desired | 2 updated | 2 total | 2 available | 0 unavailable
StrategyType:           RollingUpdate
MinReadySeconds:        0
RollingUpdateStrategy:  25% max unavailable, 25% max surge
Pod Template:
  Labels:  app=nginx
  Containers:
   nginx:
    Image:        nginx:1.7.9
    Port:         80/TCP
    Environment:  <none>
    Mounts:       <none>
  Volumes:        <none>
Conditions:
  Type           Status  Reason
  ----           ------  ------
  Available      True    MinimumReplicasAvailable
  Progressing    True    NewReplicaSetAvailable
OldReplicaSets:  <none>
NewReplicaSet:   nginx-deployment-431080787 (2/2 replicas created)
Events:
  Type    Reason             Age   From                   Message
  ----    ------             ----  ----                   -------
  Normal  ScalingReplicaSet  3m    deployment-controller  Scaled up replica set nginx-deployment-431080787 to 2
tuxninja@tldev1:~$
And we can take a gander at the pods created for this deployment
tuxninja@tldev1:~$ kubectl get pods -l app=nginx
NAME                               READY     STATUS    RESTARTS   AGE
nginx-deployment-431080787-7131f   1/1       Running   0          4m
nginx-deployment-431080787-cgwn8   1/1       Running   0          4m
tuxninja@tldev1:~$
To see info about a specific pod run:
tuxninja@tldev1:~$ kubectl describe pod nginx-deployment-431080787-7131f
Name:           nginx-deployment-431080787-7131f
Namespace:      default
Node:           gke-tuxlabs-kubernetes-default-pool-6ede7d6a-nvfg/10.138.0.2
Start Time:     Sun, 15 Oct 2017 07:10:52 +0000
Labels:         app=nginx
                pod-template-hash=431080787
Annotations:    kubernetes.io/created-by={"kind":"SerializedReference","apiVersion":"v1","reference":{"kind":"ReplicaSet","namespace":"default","name":"nginx-deployment-431080787","uid":"faa4d17b-b177-11e7-b439-42010...
                kubernetes.io/limit-ranger=LimitRanger plugin set: cpu request for container nginx
Status:         Running
IP:             10.16.1.4
Created By:     ReplicaSet/nginx-deployment-431080787
Controlled By:  ReplicaSet/nginx-deployment-431080787
Containers:
  nginx:
    Container ID:   docker://ce850ea012243e6d31e5eabfcc07aa71c33b3c1935e1ff1670282f22ac1d0907
    Image:          nginx:1.7.9
    Image ID:       docker-pullable://nginx@sha256:e3456c851a152494c3e4ff5fcc26f240206abac0c9d794affb40e0714846c451
    Port:           80/TCP
    State:          Running
      Started:      Sun, 15 Oct 2017 07:11:01 +0000
    Ready:          True
    Restart Count:  0
    Requests:
      cpu:        100m
    Environment:  <none>
    Mounts:
      /var/run/secrets/kubernetes.io/serviceaccount from default-token-gw047 (ro)
Conditions:
  Type           Status
  Initialized    True
  Ready          True
  PodScheduled   True
Volumes:
  default-token-gw047:
    Type:        Secret (a volume populated by a Secret)
    SecretName:  default-token-gw047
    Optional:    false
QoS Class:       Burstable
Node-Selectors:  <none>
Tolerations:     node.alpha.kubernetes.io/notReady:NoExecute for 300s
                 node.alpha.kubernetes.io/unreachable:NoExecute for 300s
Events:
  Type    Reason                 Age   From                                                        Message
  ----    ------                 ----  ----                                                        -------
  Normal  Scheduled              5m    default-scheduler                                           Successfully assigned nginx-deployment-431080787-7131f to gke-tuxlabs-kubernetes-default-pool-6ede7d6a-nvfg
  Normal  SuccessfulMountVolume  5m    kubelet, gke-tuxlabs-kubernetes-default-pool-6ede7d6a-nvfg  MountVolume.SetUp succeeded for volume "default-token-gw047"
  Normal  Pulling                5m    kubelet, gke-tuxlabs-kubernetes-default-pool-6ede7d6a-nvfg  pulling image "nginx:1.7.9"
  Normal  Pulled                 5m    kubelet, gke-tuxlabs-kubernetes-default-pool-6ede7d6a-nvfg  Successfully pulled image "nginx:1.7.9"
  Normal  Created                5m    kubelet, gke-tuxlabs-kubernetes-default-pool-6ede7d6a-nvfg  Created container
  Normal  Started                5m    kubelet, gke-tuxlabs-kubernetes-default-pool-6ede7d6a-nvfg  Started container
tuxninja@tldev1:~$
Finally it’s time to expose Nginx to the Internet
tuxninja@tldev1:~$ kubectl expose deployment/nginx-deployment --port=80 --target-port=80 --name=nginx-deployment --type=LoadBalancer
service "nginx-deployment" exposed
tuxninja@tldev1:~
Check the status of our service
tuxninja@tldev1:~$ kubectl get svc nginx-deploymentNAME               TYPE           CLUSTER-IP     EXTERNAL-IP   PORT(S)        AGE
nginx-deployment   LoadBalancer   10.19.244.29   <pending>     80:31867/TCP   20s
tuxninja@tldev1:~$
Note the EXTERNAL-IP is in a pending state, once the LoadBalancer is created, this will have an IP address.
tuxninja@tldev1:~$ kubectl get svc nginx-deployment
NAME               TYPE           CLUSTER-IP     EXTERNAL-IP      PORT(S)        AGE
nginx-deployment   LoadBalancer   10.19.244.29   35.203.155.123   80:31867/TCP   1m
tuxninja@tldev1:~$ curl http://35.203.155.123
<!DOCTYPE html>
<html>
<head>
<title>Welcome to nginx!</title>
And were all done, congratulations! 🙂
In Closing…
Kubernetes is cool as a fan, and setting it up on GCP is almost as easy as pressing the big EASY button. We have barely scraped the surface here so for continued learning I recommend buying Kubernetes Up & Running by Kelsey Hightower, Brendan Burns and Joe Beda. I would follow these folks on twitter, and in addition follow Kubernetes Co-Founder Tim Hockin as well as former Docker, Google, and now Microsoft employee/guru of all things containers Jessie Frazelle.
After you are done following these inspirational leaders in the community go to youtube and watch every Kelsey Hightower video you can find. Kelsey Hightower is perhaps the tech communities best presenter and no one has done more to educate and bring Kubernetes to the mainstream than Kelsey. So a quick shout out and thank you to Kelsey for his contributions to the community. In his honor here are two of my favorite videos from Kelsey. [ one ] [ two ].
Setting up Kubernetes to manage containers on the Google Cloud Platform Read More »